Checkpoints in UFT(Part 5)-Accessibility and Database checkpoint.
9. Accessibility checkpoint
This checkpoint is supported only when the web add-in is available and loaded. It checks or recognizes if the areas on a website conform to WWW consortium Web accessibility guidelines.
It can be added while recording or editing through active screen.
The properties that we can check based on the accessibility checkpoint are:
The settings can be changed from the menu option “Tools->Options->Web->Advanced- Accessibility options. You can check or uncheck the options as required.
To insert, simply start recording a test. In my case, I am opening a Gmail.com page and I am doing this by setting the URL properties in the record and run setting instead of programmatically. As soon as the Gmail.com page has opened I chose the menu option “Insert->Checkpoint->Accessibility checkpoint” and click on the page. The following screen opens up:
9. Accessibility checkpoint
This checkpoint is supported only when the web add-in is available and loaded. It checks or recognizes if the areas on a website conform to WWW consortium Web accessibility guidelines.
It can be added while recording or editing through active screen.
The properties that we can check based on the accessibility checkpoint are:
- Active X check
- Alt property check
- Applet check
- Frame titles check
- Multimedia check
- Server side Image check
- Tables check
The settings can be changed from the menu option “Tools->Options->Web->Advanced- Accessibility options. You can check or uncheck the options as required.
To insert, simply start recording a test. In my case, I am opening a Gmail.com page and I am doing this by setting the URL properties in the record and run setting instead of programmatically. As soon as the Gmail.com page has opened I chose the menu option “Insert->Checkpoint->Accessibility checkpoint” and click on the page. The following screen opens up:
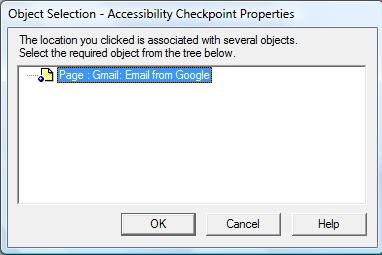
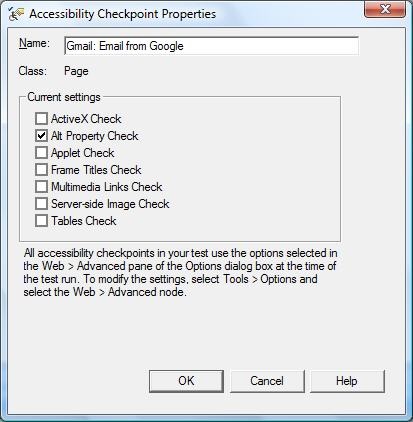
Choose the page object and click OK. The properties that can be checked will be displayed for the user to choose one or multiple options. Also, the message at the end of the property selection explains the basis on which the default selection is made.
Let us take a look at what options are chosen at “Web->Advanced” pane of the Options dialog box.
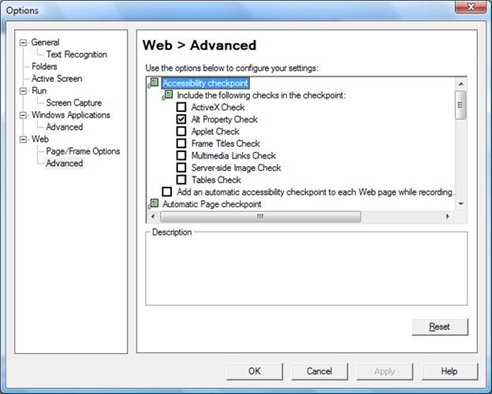
This explains why only the “Alt Property check” is selected by default in the “Accessibility Checkpoint Properties dialog box”. If I had a different set of checks ON in the Web->Advanced pane of the Options dialog box, the same would reflect for any of the subsequent Accessibility checkpoints that you might include in your test.
Click OK on the Accessibility Checkpoint Properties dialog box. As in the case of the other checkpoints, the following statement gets added to your test.
1. Browser("Gmail: Email from Google").Page("Gmail: Email from Google").Check CheckPoint("Gmail: Email from Google")
You can modify it just the way you would do with any other checkpoints from the OR and the test results will show a pass if the check has passed or failed if it did not.
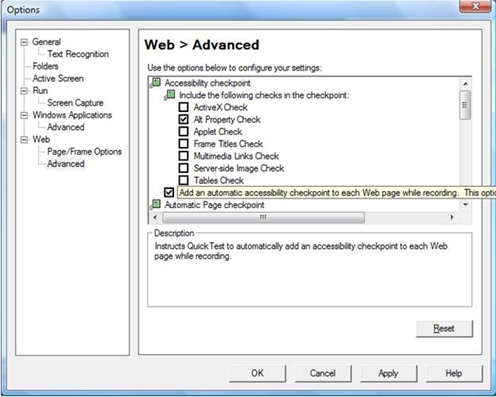
You can choose to add a check by default to every web page you access by setting the option ON as shown in the below screenshot:
Click OK on the Accessibility Checkpoint Properties dialog box. As in the case of the other checkpoints, the following statement gets added to your test.
1. Browser("Gmail: Email from Google").Page("Gmail: Email from Google").Check CheckPoint("Gmail: Email from Google")
You can modify it just the way you would do with any other checkpoints from the OR and the test results will show a pass if the check has passed or failed if it did not.
You can choose to add a check by default to every web page you access by setting the option ON as shown in the below screenshot:
10.Database checkpoint:
The way this checkpoint works is, you first define a query on your database and create a DB checkpoint that checks the results of the query and thus detects defects.
Two ways to define a query:
1) Microsoft query – You can install Microsoft Query from the custom installation of Microsoft Office.
2) Manually write a SQL query.
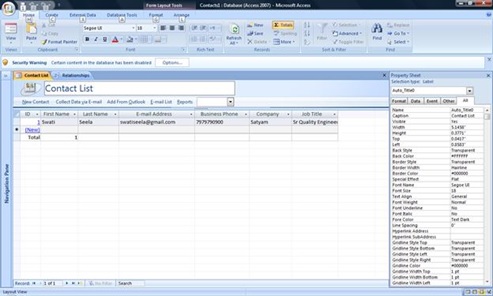
I just created a Microsoft Access table named Contacts and added a row with my information. This is how the table looks:
The way this checkpoint works is, you first define a query on your database and create a DB checkpoint that checks the results of the query and thus detects defects.
Two ways to define a query:
1) Microsoft query – You can install Microsoft Query from the custom installation of Microsoft Office.
2) Manually write a SQL query.
I just created a Microsoft Access table named Contacts and added a row with my information. This is how the table looks:
I want to place a database checkpoint on this. The following are the steps:
Step #1) Select “Insert->Database Checkpoint” from the menu.
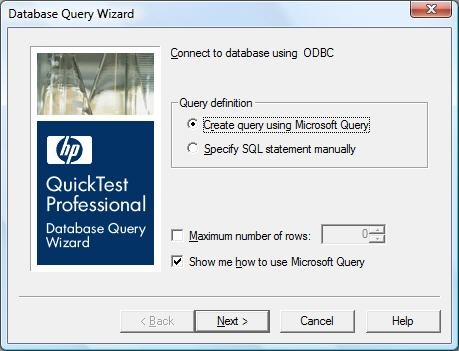
Step #2) In the following screen, select “Specify SQL Query manually” option and select Ok.
Step #1) Select “Insert->Database Checkpoint” from the menu.
Step #2) In the following screen, select “Specify SQL Query manually” option and select Ok.
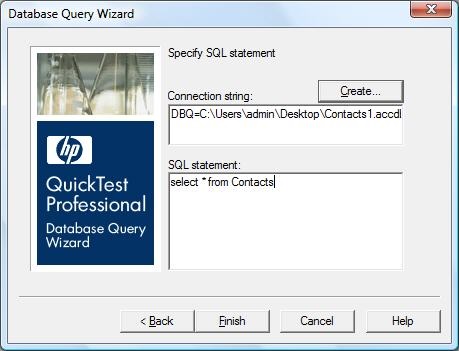
Step #3) You will need to create a connection string. So click “Create” in the screen
Step #4) If you already have a DSN created. Choose it from the below screen
Step #4) If you already have a DSN created. Choose it from the below screen
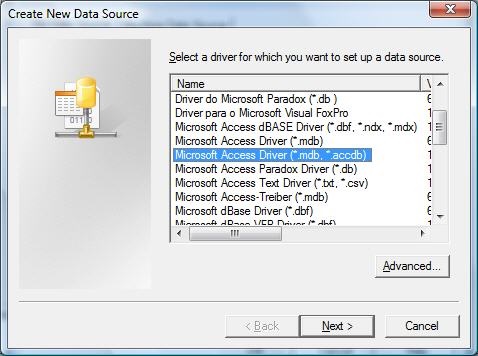
Step #5) If you do not have a created DSN, we will create one. Click on the “New” button and choose your database type from the list available. I am going to choose “Microsoft Access Driver (.mdb, .accdb)” from the list.
Step #6) Click Next and Browse for a location where you would want this DSN to be saved. I chose desktop and click Ok. In the next screen, Click Finish.
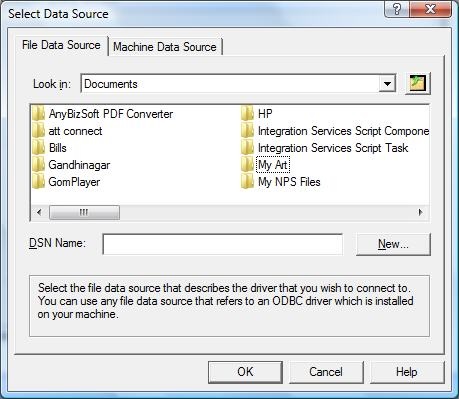
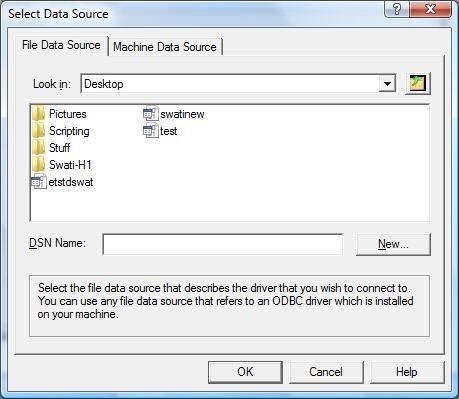
Step #7) In the below screen, you can choose to select the data source, i.e the database on which you want to run the query. Click Select and browse for your database.
Step #7) In the below screen, you can choose to select the data source, i.e the database on which you want to run the query. Click Select and browse for your database.

Step #8) Choose your DB and click OK. The DSN that you have just created will appear in the list. Select it from the below screen, and click OK.
Step #9) You connection string is now created. All you need to do is put in the SQL query. For simplicity’s sake I am just going to do a “Select * from Contacts” and click Finish.
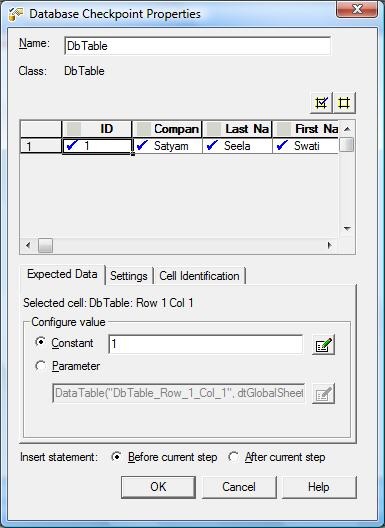
Step #10) The results of your query run will be displayed in the “Database Checkpoint Properties” dialog box as follows. You can choose to check for just one columnXrow combination or multiple ones, as you would like in the below screen. All the other options are also self explanatory. You could also parameterize the expected results for more complicated scenarios.
Step #11) The settings tab can be used to set the value match criteria
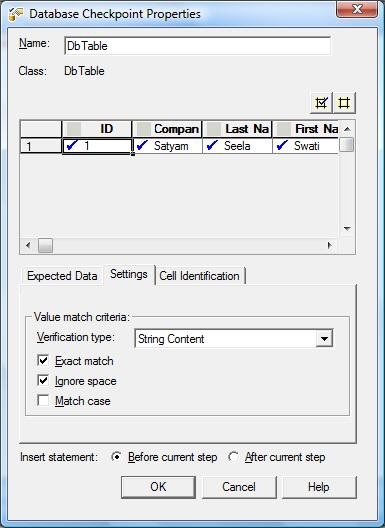
Step #12) The Cell identification tab can be used to specify the way in which you would want QTP to identify rows and columns.

Step #13) Once the properties are set and the checkpoint is created, the following statement gets added to your test.
1. DbTable("DbTable").Check CheckPoint("DbTable")
Step #14) The test results will show any deviations in the expected and actual results when the test runs.
1. DbTable("DbTable").Check CheckPoint("DbTable")
Step #14) The test results will show any deviations in the expected and actual results when the test runs.
 RSS Feed
