Checkpoints in UFT(Part 2) - Image and Bitmap Checkpoint
2. Image Checkpoint:
A slight variation of a standard checkpoint is while it is used on web images.
In case the object on which the checkpoint inserted happens to be a web image, the following dialog box opens up.
2. Image Checkpoint:
A slight variation of a standard checkpoint is while it is used on web images.
In case the object on which the checkpoint inserted happens to be a web image, the following dialog box opens up.
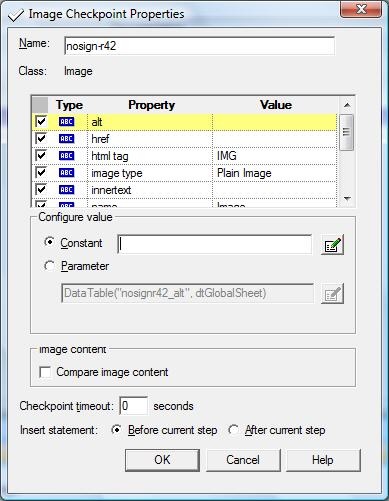
It should be noted that this screen is almost identical to “Checkpoint Properties” dialog, it is specific to images.
The only extra parameter is the “Compare Image Content” checkbox. If it is checked, the image in run time is checked with the one stored during the creation of the checkpoint to see if it is exactly the same. If they are the same, the test results will only have one image. If they are different both the images will be displayed in the test results.
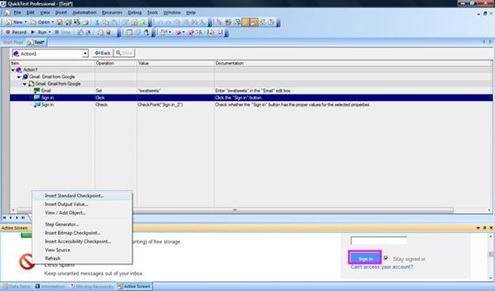
For example, on the gmail page, I tried to insert a standard checkpoint on one of the images from the Active screen and this is what gets displayed:
The only extra parameter is the “Compare Image Content” checkbox. If it is checked, the image in run time is checked with the one stored during the creation of the checkpoint to see if it is exactly the same. If they are the same, the test results will only have one image. If they are different both the images will be displayed in the test results.
For example, on the gmail page, I tried to insert a standard checkpoint on one of the images from the Active screen and this is what gets displayed:
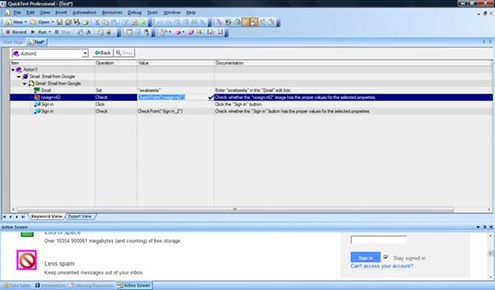
I will not make any changes in the dialog, you can if you wish to and click OK.
This is how the inserted checkpoint is going to be:
This is how the inserted checkpoint is going to be:
3.Bitmap checkpoint
A lot can be inferred from the name of this checkpoint itself. However, it is often confused with the Image checkpoint.
Differences between Image and Bitmap checkpoints:
Difference #1: Image checkpoint works only on Web environment whereas Bitmap checkpoint works on any supported environments.
Difference #2: Bitmap checkpoint can be used to compare an area of an application or page, an object or any part of an object. On setting this checkpoint it captures the chosen portion of the screen as a bitmap and compares it with the result at run time. In contrast, image checkpoint is just for webimage objects.
Therefore, Bitmap checkpoint captures the visible parts of your AUT and compares them as bitmaps, pixel by pixel.
Typically this is used to check maps, logos or any other diagrams in your AUT.
Couple of important points to remember:
I start a test with record and run settings set in a way that it opens www.gmail.com on internet explorer when I record the test. Then I select Insert->Checkpoint->Bit map checkpoint. Then I select the ‘google’ logo on the www.gmail page. The following dialog opens up:
A lot can be inferred from the name of this checkpoint itself. However, it is often confused with the Image checkpoint.
Differences between Image and Bitmap checkpoints:
Difference #1: Image checkpoint works only on Web environment whereas Bitmap checkpoint works on any supported environments.
Difference #2: Bitmap checkpoint can be used to compare an area of an application or page, an object or any part of an object. On setting this checkpoint it captures the chosen portion of the screen as a bitmap and compares it with the result at run time. In contrast, image checkpoint is just for webimage objects.
Therefore, Bitmap checkpoint captures the visible parts of your AUT and compares them as bitmaps, pixel by pixel.
Typically this is used to check maps, logos or any other diagrams in your AUT.
Couple of important points to remember:
- Bit map checkpoints are dependent on factors like screen resolution, Operating systems and RGB settings. So any changes to any of these factors will cause the checkpoint to fail.
- When creating the checkpoint, QTP does not record any part that is scrolled off the screen or hidden by any other object.
- While capturing the bitmap if another app is overlapping you AUT then that part of the screen is also captured.
- It can be added while recording or from the active screen.
I start a test with record and run settings set in a way that it opens www.gmail.com on internet explorer when I record the test. Then I select Insert->Checkpoint->Bit map checkpoint. Then I select the ‘google’ logo on the www.gmail page. The following dialog opens up:
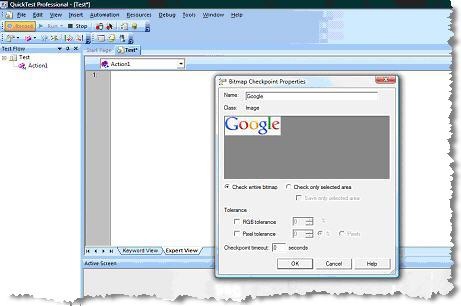
Take a close look at the above window.
a) The image appears in the Bitmap checkpoint properties dialog and then the user has an option to choose either to check for the entire image or choose a selection.
b) If you check on the ‘Check only selected area’ option to be ON, then you will be able to select the portion of the image. Since it is hard to represent it pictorially, I would suggest the readers give it a try practically to see how this works.
c) The other options in the screen are basically the fine tuning properties. They are really there to make sure the checkpoint passes even though certain RGB or pixels are a little inconsistent.
I will go ahead and choose a portion of the logo and click OK.
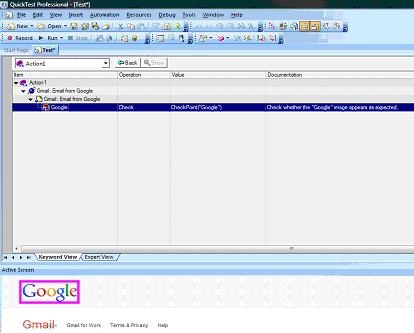
The following statement is generated in the Expert view:
Browser("Gmail: Email from Google").Page("Gmail: Email from Google").Image("Google").Check CheckPoint("Google")
Keyword view looks like this:
a) The image appears in the Bitmap checkpoint properties dialog and then the user has an option to choose either to check for the entire image or choose a selection.
b) If you check on the ‘Check only selected area’ option to be ON, then you will be able to select the portion of the image. Since it is hard to represent it pictorially, I would suggest the readers give it a try practically to see how this works.
c) The other options in the screen are basically the fine tuning properties. They are really there to make sure the checkpoint passes even though certain RGB or pixels are a little inconsistent.
- RGB tolerance: Once set this value will determine how many RGB values of the pixels can be different for the checkpoint to not fail.
- Pixel tolerance: when this option is checked on, the user has to select whether he wants to specify this value in % or a number. For example, if the user chooses 5 pixels and the image has 1000 pixels. If in run time, up to 5 different pixels the differences are not counted towards failing the checkpoint. If more than 5 differences exist, only then the checkpoint fails. If both RBG tolerance and Pixel tolerance values are set, RGB tolerance is calculated first.
I will go ahead and choose a portion of the logo and click OK.
The following statement is generated in the Expert view:
Browser("Gmail: Email from Google").Page("Gmail: Email from Google").Image("Google").Check CheckPoint("Google")
Keyword view looks like this:
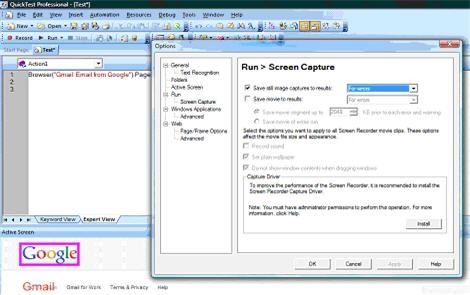
- In case there is a difference in the image in runtime, the checkpoint fails and the two images (one saved, one that came up during runtime) are displayed in the test results.
- This feature can be configured from: Tools->Options->Run->Screen capture
Once created the Bitmap checkpoint it can be edited later on from the checkpoint properties screen. This dialog can be launched from the Keyword view, expert view or the Object Repository.
 RSS Feed
